I really needed to get my bake on! Let me tell you a bit more about me and then Rosedene Bakery's unique Afternoon Tea package. I'm Anna and I inherited my Nan's passion for baking. When I was made redundant from the banking sector early in 2013, I finally took the plunge and started my own baking business. I knew that I wanted to offer something completely different to what the other local "Cakers" were doing and I knew that I didn't aspire to being a wedding cake maker – I just don't have the patience or dexterity needed for that level of intricate work. Whilst I envy those that produce spectacular novelty cakes, again; they take intense patience and a precision that I just do not possess. Besides, I wanted to BAKE, not decorate.
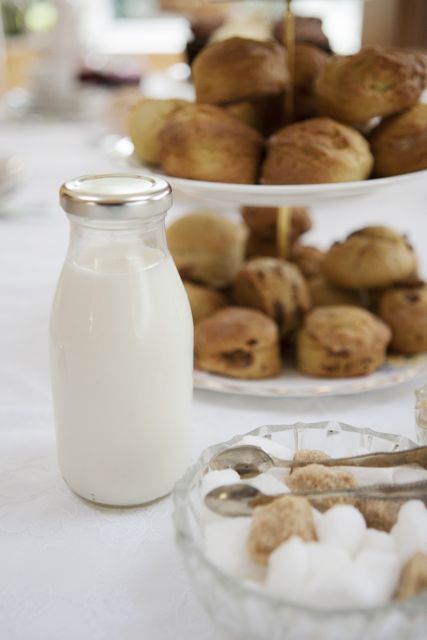
Baking for me is things like sponge cakes, scones and biscuits with amazing smells permeating from the kitchen, scents that make you salivate as soon as you walk in to the house. But other than opening my own bakery or shop, which just wasn't an option, how could I do lots of baking for my own business? My answer? Afternoon tea. Afternoon tea with a difference. This offering is made by me and delivered to your home (or business or event venue). Then to add to the experience, I invested in LOTS of lovely vintage china to hire out - such a hardship I can tell you! I visit your home, providing all the goodies you need for your afternoon tea: scrummy scones, soft Victoria sponge, Bakewell tart, delicious cupcakes. I include all the little extras; jams, clotted cream, butter, tea, even sugar cubes and I will either leave it all with you or I can come in and set it all up, whilst you put on your 'Sunday Best' - I'll even stay to serve you and your guests for a little extra decadence. Then, if you've hired the china I will pop back to collect it... It couldn't be easier. So, as I was devising my menus, I decided that I didn't want to include sandwiches that could curl up or dry out, but asked myself what could I offer to cover the savoury element? My immediate thought was cheese scones, especially as they had been so well received when I tried them on friends and family. But for those wanting a bit more substance for their afternoon tea, I included a quiche and my journey into savoury pastry began… It seems simple when you first consider it. To make some pastry; roll it out, line a tin, blind bake it, add some cheese and onion, then carefully pour over the egg & milk mix (being careful not to let it slop out), back in the oven to bake for 30 minutes and voila! ... OH NO!! Any tiny crack or hole in the pastry means leakage resulting in, at the very best, a soggy bottom and at worst; a total loss of the creamy filling, being left with a soggy cheesy, oniony mess! I suffered more than my fair share in the early days, I can tell you. I don't know if there is a failsafe knack to it - if there is, I hope to find it soon! It still happens. I had three to make last week and ended up with two soggy messes on my first attempt and another on my second attempt - I had made another three just in case... good job hubby likes quiche! For now, I feel a sense of excited trepidation when I get an order for one (although they do say practice makes perfect). But when they work? I feel a sense of real achievement, they are utterly delicious and very well received - even if I do hold my breath as I pour the gorgeous, creamy filling into the tin!!
 The Rosedene's Perfect Quiche Recipe For the pastry:
 8oz flour (I use plain) 4oz butter 10-12 tsp water
For the filling: 1 large red onion 1 or 2 gloves of garlic, crushed 8 cherry tomatoes, halved 125g mature Cheddar cheese, grated 3 eggs 250ml milk 1 tsp wholegrain or Dijon mustard 1/3 tsp ground black pepper 1 tbsp olive oil
Method – Pastry Many recipe books will tell you to sift the flour into a bowl, then cut in the butter with a knife, then rub the butter into the flour until the mixture resembles breadcrumbs. I will be honest here, I don't do this - I put all the ingredients into my mixer and on a slow setting I achieve that result. However you achieve the breadcrumb like mixture, once you have it, slowly add the water a bit at a time and mix until you get a crumbly looking paste. If you're not using a mixer, use a knife for this as you want to handle the pastry as little as possible. Once you have the crumbly paste, bring the mixture together with your fingertips, turn onto a floured surface and quickly knead into a dough. If you're using a mixer, it will do the work for you. Once you have your pastry dough, I always think it's best to rest it in the fridge, even if it's just for 10 minutes (I generally just leave it in there while I prepare my filling). At this stage, the pastry can be frozen (I quite often make twice as much pastry as I need, just in case of disaster, so often end up freezing batches of pastry). Once the pastry has been chilled slightly, remove from the fridge and roll the pastry out on a floured surface. CAREFULLY, lift the pastry, by rolling loosely around your rolling pin and line your tin. Make sure there are no gaps, really thin areas or holes – these would result in leakage, which you really don't want. I don't even trim the edges to meet the edge of the tin, as this results in shrinkage. I leave the edges about 1cm over the edge of the tin – for me , better a slightly untidy edge than a soggy bottom! Line the pastry with some good quality baking paper, then cover the bottom of that with either baking beans or dry rice. Blind bake the pastry for around 15 minutes - I put the tin on a baking tray or in a swiss roll tin to make getting it out of the oven easier. After 15 minutes CAREFULLY remove the baking paper and rice/beans and continue baking for a further 5 minutes, this will ensure the pastry is fully cooked pre filling. Once the blind bake is complete, really carefully remove the baked quiche case from the oven - it's really easy to knock it and crack it, and thus make it not filling proof. It's now ready to add the filling.
Method – Filling Peel and slice your onion into fine quarter moons - I use a red onion but, you could use a white one or some spring onions. Gently heat the olive oil over a medium heat. Add the onion and crushed garlic to the pan and gently soften. Don't allow them to catch or burn or this will affect the flavour of your quiche. Once softened, leave to cool slightly. Using a large jug or bowl add the eggs, beat until just combined. Add the milk, pepper and mustard and lightly beat to combine. Set to one side.
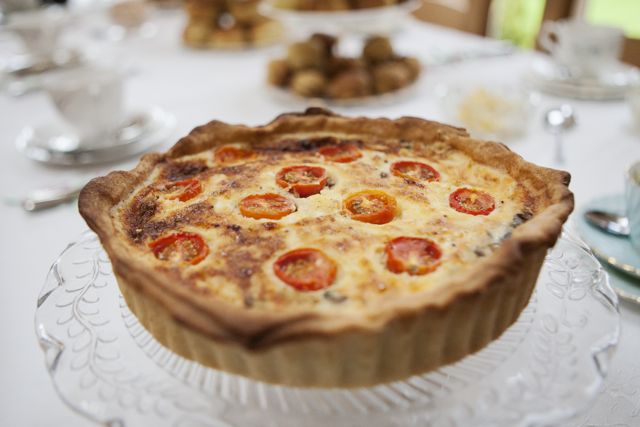
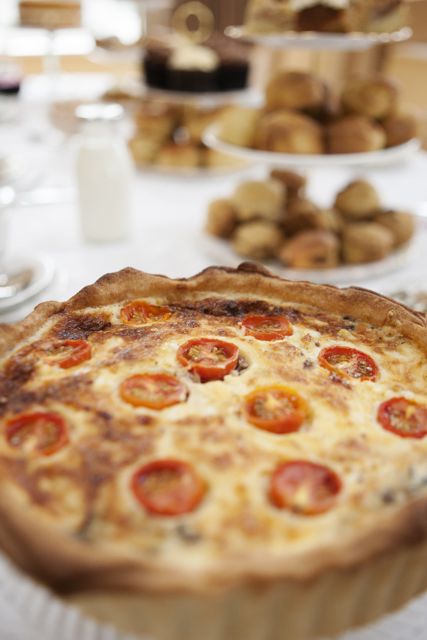
Assembling the quiche for baking Once your pastry case is baked, you can add your filling. I cannot express strongly enough the need to be really gentle here – many a time have I been caught out by my heavy handedness, cracking the pastry, meaning I've had to start that process all over again. Spread the onions over the base of the pastry, then sprinkle your cheese over the onions. Give your wet filling a little stir to ensure an even distribution of ingredients, then slowly pour into the case. Don't be tempted to fill right to the top, it's tempting spilling fate! The filling should be around 5mm – 1 cm from the top. If you haven't quite got enough filling, quickly mix up 1 further egg and 75ml of milk and pour evenly over the top. Add the halved tomatoes, seed side up to the top in a decorative pattern. Place the quiche back into the oven and bake for a further 25 minutes or until set and slightly golden on top. Remove from the oven, either enjoying warm or simply serve cold later. Give yourself a massive pat on the back if there were no spillages, you are a complete star!! Do feel free to play with different ingredients, the world is your quiche!
 What is your "go to" quiche recipe? Any disasters or successes to share with us? - Leave a comment below to join in the conversation!
Guest post written & recipe creation by Anna at
www.rosedenebakery.co.uk Images courtesy of Kelly Jo Hearsey at
www.kellyjophotography.co.uk
 Guest post written & recipe creation by Anna at www.rosedenebakery.co.uk Images courtesy of Kelly Jo Hearsey at www.kellyjophotography.co.uk
No comments:
Post a Comment